Suppose you bought a foosball table and you found out that the instructions on how 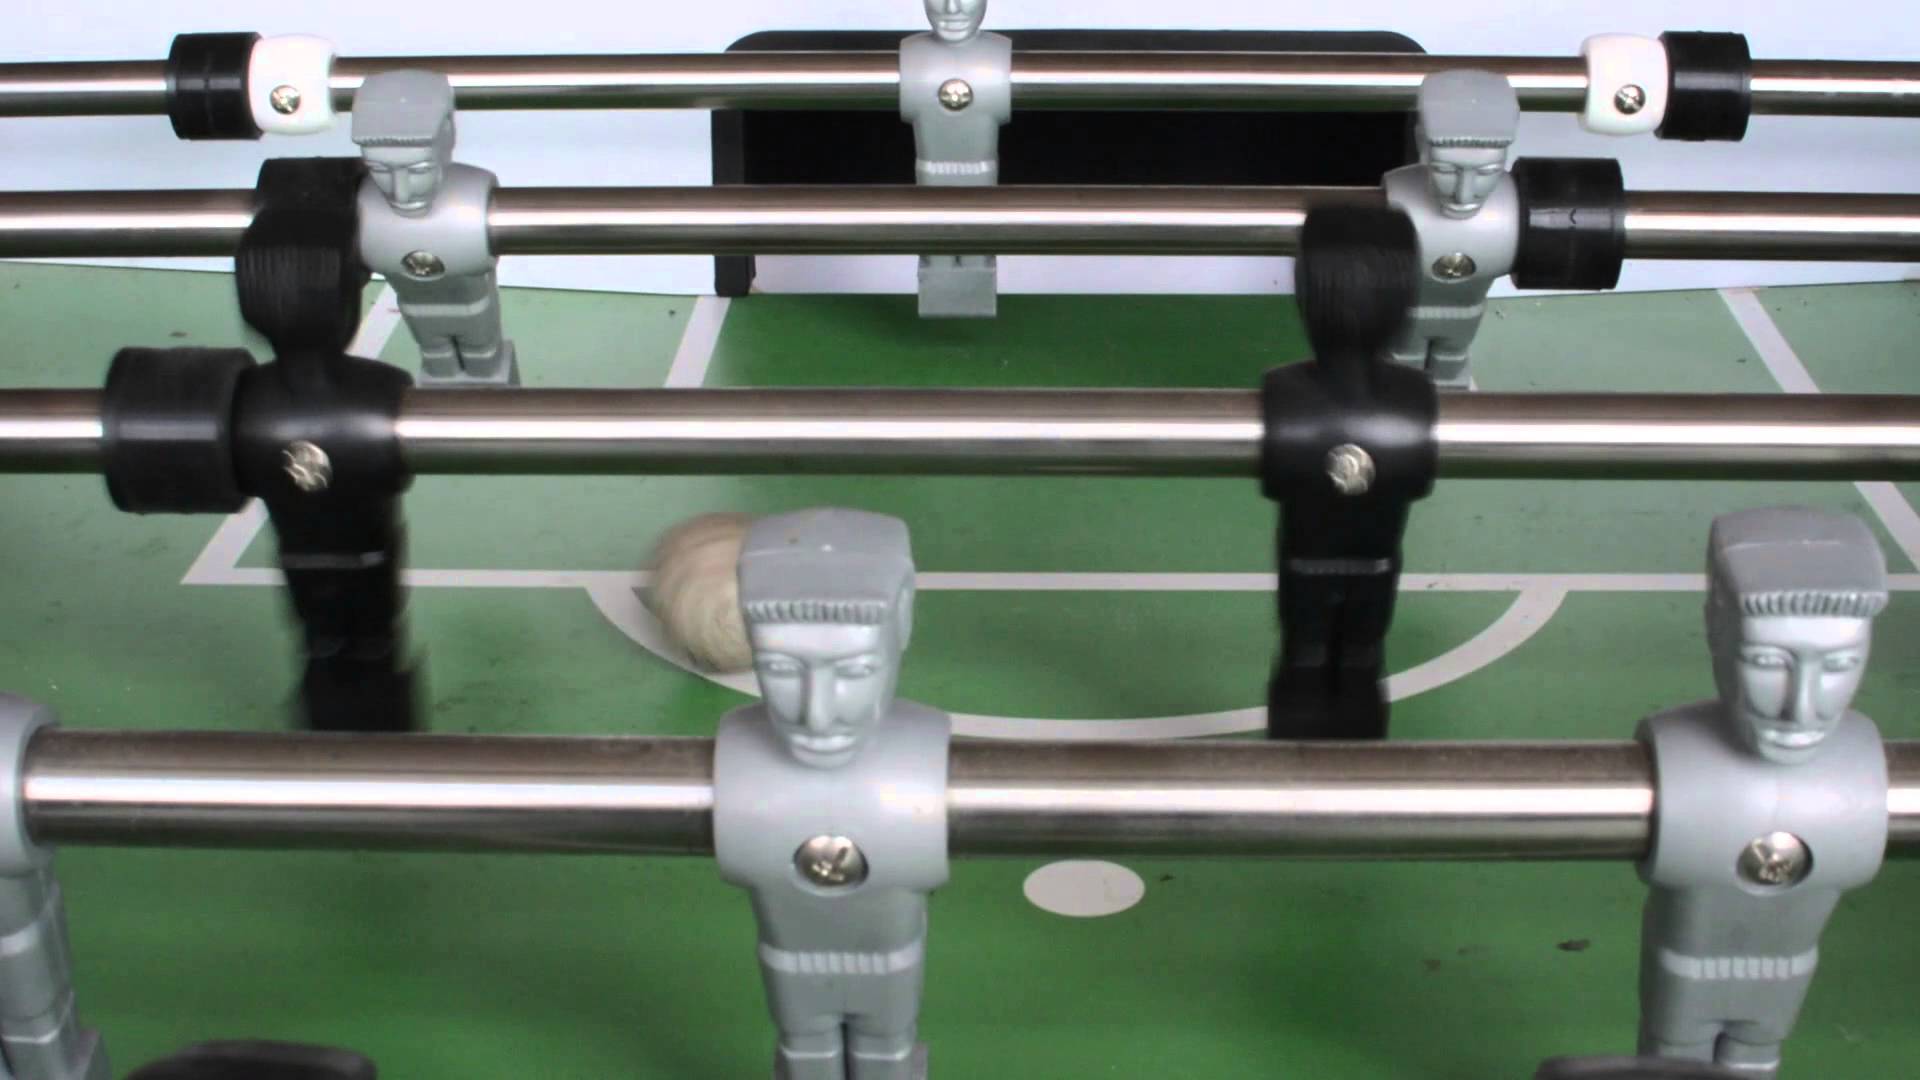 to set up wasn’t clear to you. Or, maybe you need more of a visual to get a better understanding.
Well, for this article, I am going to give you the best possible ideas to guide you as best as I can in setting up your table to be up and ready to play. I’ll also do my best where you can start playing foosball in the least amount of time possible. That way, you wouldn’t have to spend too many hours setting up. The set up would require around two hours tops. Hopefully, I can get you playing sooner than that.
Before the setup: locate all necessary parts
For this step, you’re going to want to have all the necessary foosball parts that come with your purchase of the foosball table. You can lay them on a table or floor where it’s ready to be assembled: players/men, rods, balls, bumpers, legs, handles, wraps, tubes, scoring units, cup holder, and pins & pouch.
Once all the parts have been located, make sure to organize them so that they are ready to be assembled. One recommendation to organize would be to have all parts in sequential order so you wouldn’t have to keep scanning on the table or floor to locate where the next item to put on after the last setup.
Step 1: Attaching the legs
This is the part where the actual installation of a typical foosball table begins. Once all the parts have been located, you’re going to want to first have the table upside down on the floor. I am going to go through the basics of setting up the foosball table as I’ve provided a more thorough video to guide you more effectively below Step 2. For this first step you’re going to first attach the four legs to the four corners of the table. To secure the legs in place, make sure that the bolts that go through the legs fit securely through the table. After that’s done, fasten the end nut so the bolts are held in place. Do this for all the legs of the table before setting it upright. It is highly advised that you have a partner in helping you out as the table is quite heavy to lift.
Step 2: Assembling the men, rods, grips, scoring unit and cup holder
Once the table has been set upright, you’re going to now assemble the men to the rods. In order to do this, first slide the rod through one end of the table. After that, slide the bumper for each number of men that can go on that rod. It is also advised to put a disposable rag or cloth on the table layout to catch the dust that comes with the rods as the men go through them. The next thing to do is prevent warping by placing the bracer block between the rod and table. The next thing to do is to secure the men on the rods they’re being held securely. You can do this by using the appropriate screws and screwdriver to attach the men on the rods. Once all of that has been in place the last thing to do is install the grips for the rod handles, scoring unit, and cup holder in that order. There’s a site that goes through these two steps in detail by going here.
Use silicone
The silicone is not part of the foosball use, but it’s a supplement that can keep the life of your foosball table running a long time and for years to come. The main use of the silicone is to keep the rods clean and maintained. It is also used for bearings to keep it lubricated. It is highly advised to not use any other liquids such as water as it can put rust on the bearing and rods.
Optional accessory: overhead lighting
If you want to be fancy or if you want that “authentic” or “flashy feeling” of playing foosball, you can use an overhead lighting to go above your foosball table. Although, it’s not necessary, a standard overhead light is needed to play a nice game of foosball. Just make sure that there is enough lighting so that you can see where the balls are going and be able to move or “kick” them using the men on the rods.
In Conclusion…
I hope you liked this tutorial. I hope I gave you an insightful idea to install the foosball table effectively. Please add a comment/reply/question to this article as I would appreciate it. Also please share, like, and subscribe. Thanks.
To your foosball enjoyment,
Armand
Permalink
Permalink
Permalink
Permalink
Permalink
Permalink
Permalink
Permalink
Permalink //
I appreciate that you explained gathering the right power tools that are necessary for building the table. As part of our basement renovations this summer, I want to add a game room and have a foosball table down there. I’ll have to look online for the best foosball tables that are easy to set up for my new game room.
Permalink //
Hello Sara. Thanks for stopping by and leaving a comment. I hope you find that foosball table that fits your your game room and your needs. All the best!
Permalink //
Such an amazing post. Thanks for this great post, I find it very interesting and very well thought out and put together. I look forward to reading your work in the future.
Permalink //
Thank you, Cecil! I always try to give as much relevant information when it comes to doing “how-tos” on this site with the emphasis on gaming tables. I will continue to post more how-tos on this site and will look forward to hearing from you again. Have a great day!
Permalink //
I’ve always wanted to own a foosball table and have wondered how difficult it would be to set up without actually seeing someone do it.
Your instructions are very detailed and I think that anyone would be able to follow them easily if they are having trouble following the instructions that came with the table. I didn’t realize how many parts there were going to be thought!
What kind of foosball table would you recommend for someone just starting to learn?
Permalink //
Hello Nate
Thanks for replying. Yes, assembly is required for all foosball tables. I have just provided a post to my site where a foosball table caters to your needs. You can check it out here. I’m hoping this satisfies you.
-Armand